Linux Mint
Introduction
Linux Mint is a computer operating system designed to work on most modern systems, including typical x86 and x64 PCs.
Linux Mint can be thought of as filling the same role as Microsoft's Windows, Apple's Mac OS, and the free BSD OS. Linux Mint is also designed to work in conjunction with other operating systems (including those listed above), and can automatically set up a "dual boot" or "multi-boot" environment (where the user is prompted as to which operating system to start at each boot-up) during its installation.
Linux Mint is great operating system for individuals and for companies.
History
Linux Mint is a very modern operating system; Its development started in 2006. It is, however, built upon very mature and proven software layers, including the Linux kernel, the GNU tools and the Cinnamon desktop. It also relies on the Ubuntu and Debian projects and uses their systems as a base.
The Linux Mint project focuses on making the desktop more usable and more efficient for everyday tasks performed by regular users. Underneath the desktop the operating system also provides a huge collection of available software and a very well integrated set of services.
Linux Mint saw a rapid rise in popularity and more and more people use it every day.
Purpose
The purpose of Linux Mint is to provide a desktop operating system that how users and companies can use at no cost and which is as efficient, easy to use, and elegant as possible.
One of the ambitions of the Linux Mint project is to become the best operating system available by making it easy for people to get to use advanced technologies, rather than by simplifying them (and thereby reducing their capabilities), or by copying the approaches taken by other developers.
The goal is to develop our own idea of the ideal desktop. We think that it is best to make the most out of the modern technologies that exist under Linux and make it easy for everybody to use its most advanced features.
Linux Mint Version
Version Codename
1.0 Ada
2.0 Barbara
2.1 Bea
2.2 Bianca
3.0 Cassandra
3.1 Celena
4.0 Daryna
5 Elyssa
6 Felicia
7 Gloria
8 Helena
9 Isadora
10 Julia
11 Katya
12 Lisa
13 Maya
14 Nadia
15 Olivia
16 Petra
17 Qiana
17.1 Rebecca
17.2 Rafaela
17.3 Rose
18 Sarah
Installation of Linux Mint
You can download the Linux Mint operating system for free. It comes as an ISO file which you need to burn to a blank DVD. The liveDVD is then bootable and provides a fully-functional operating system which you can try without affecting your PC. In layman's terms. when you put Linux Mint on a DVD and place it into your computer, you can try it out while leaving your current system intact.
Note: It is also possible to write the ISO image to a USB stick or other memory device and boot from that, or to boot from the ISO image on the hard drive, but these options are somewhat more advanced and the method presented here is recommended. For help with alternative methods of installing and running, please visit the forums.
If you like what you see when running the liveDVD you can decide to install the system to your hard drive. All the necessary tools (partitioning and installation tools) are present on DVD.
Download the ISO
Note:- If you don't have a broadband connection, on if your Internet access is too slow you can order the DVD from this web site: https://www.osdisc.com/
Otherwise, you can visit the download page here: https://linuxmint.com/download.php
Then choose the edition you're interested in.
From this page, you should be able to find:
- a torrent link
- how to verify your ISO
- a list of download mirrors
Via Torrent
Torrent is a Peer to Peer(P2P) protocol. Basically, instead of downloading from a central location, a torrent lets you download the ISO file in parts from different people across the Internet.
The more people who download the ISO file, the faster the download speed gets. This is the preferred and recommended way to download.
Install a Torrent client
You need a piece of software called a "torrent client" in order to download files via torrent.
If you run Linux, you can install "transmission". If you run, Transmission is already installed.
If you run Windows, you can use µTorrent.
Download the Torrent file
The next step is to follow the torrent link from the website and to download the .torrent file. This file is very small. After it download to complete.
For more information about the torrent protocol, visit:
Via a download mirror
If you can't or do not choose to use the torrent protocol, then look at the list of download mirrors and pick one of them. They'll provide a link to the ISO file itself which you can just click to start the download.
Note:- Remember that bandwidth is limited though and the more people download from a mirror, the slower the download speed gets for everybody who is downloading from that mirror. Furthermore, if for some reason the download should be interrupted, it may be corrupted and the download may have to be restarted. For these reasons it might be worthwhile using a download manager, like for Linux, or for Windows, if taking this route.
Verify the ISO
You just say can't wait to play with the new features or try, and your download just finished successfully. You're ready to burn a DVD and to boot on it.... but hey! Wait for a second!
If that DVD is faulty you will experience weird bugs and will have a lot of trouble finding help. The two most common reasons for a DVD to be faulty are:
- An issue with download causing problems in your ISO file (this is less likely to happen using torrent)
- An error during the burn process that alerts the contents of your burned liveDVD
If you run any version of Linux you probably already have the sha256sum program installed. Open a terminal and "cd" the the directory where your ISO file is (for instance, if "linuxmint.iso" is on Desktop), open a terminal and type:
This command should output a series of numbers and letters which comprise the SHA256 checksum of your ISO file. By design, any small change to the ISO file will exactly as it should be.cd ~/Desktopsha256sum -b linuxmint.iso
Compare that checksum with the one you can find from the "verify your ISO" link on the download page of the website. If the two checksum are the same, then you know your ISO file is exactly the same as the original and you can now get ready to burn it on DVD.
If you happen to run Windows, chances are you don't have sha256sum installed. You can get it from here: http://www.labtestproject.com/files/win/sha256sum/sha256sum.exe
Place the ISO file and the sha256sum.exe in the same place (let's say in C:\) and run "cmd.exe". In the command line environment, type the following commands:
C:Then compare the signature to the one present on the website.
cd \
sha256sum linuxmint.iso
Burn the ISO to DVD
Now that you have checked the ISO file you are ready to burn it to a DVD.
Get a blank DVD-R (a DVD-RW should work as well, but this type of media is know to have compatibility issues) and your favorite marker and label DVD. Although labeling your DVDs sounds trivial, you should be sure to do so, as you can easily end up with 20 unlabeled and unidentifiable discs on your desk. :)
Insert the blank DVD-R in the drive and get ready to burn the ISO.
If you're running with Cinnamon right-click on the ISO file and select: open with: Brasero, choose "burn image" and follow the steps given there.
If you're running with KDE, launch K3B and in the "Tools" menu choose "write ISO image".
If you're running Linux and would like to use terminal, from the directory you have downloaded the image to:
Replacing the numbers after dev= with the appropriate number for your disc drive and using the proper iso-name. You can runcdrecord -v -dao dev=1,0,0 linuxmint.iso
cdrecord -scanbusto find this out. You may need to be root to run these commands.
If you're running Windows you can use a program like InfraRecorder:
http://infrarecorder.org/
Note:- Make sure to burn the ISO image to disk, and not write the ISO file to the disk. A very common mistake, especially for people using Nero, is to actually burn the ISO file on the disk as a data file. The ISO file is an image of a disk so it needs to be burnt not as a file which will appear on the disk, but as an ISO image which will be decompressed and whose content will be burnt onto the disc. After burning the DVD you shouldn't see the ISO file within the disc, but rather folder like "casper"or "isolinux". Most burning software has a special option for this.
Boot the LiveDVD
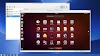
Place the DVD in the drive in the drive and restart the computer. You should now see the following screen:

Install Linux Mint on your Hard Drive
From the first screen choose the default "start Linux Mint" option and press Enter. After a little while the live system should be ready and you should see the desktop.
At this stage Linux Mint is not installed on your computer, it's simply running from the DVD. The system you have in front of you is, however, almost exactly the same as the one you will have on your computer after the installation is finished.
Have fun with it and see if you like it. Bear in mind that when running from the DVD, Linux Mint runs significantly slower than it does when it is installed on a hard drive, since it has to read data from the DVD drive, which is a slower medium than the hard drive.
When you are ready, double-click on the "Install Linux Mint" icon located on the desktop. The Installer appears:

Select your language and press the "Continue" button.

Note:- If you intend to redistribute or to make commercial use of Linux Mint in the USA or in Japan and if you're not sure about software patent legislation you should not enable this option.


- If you choose to use the entire disk, its content will be erased and Linux Mint will be installed as the only operating system on your computer.
- If you choose to install it alongside other operating systems, the installer will use the free space available on other partitions to create a new one for Linux Mint. You will be asked how much space you want to allocate to it. The installer will then shrink a partition and take care of everything for you. Post-installation your computer will have a boot screen from which you'll be able to boot all your operating systems.
- If you choose to specify partitions manually, a partition editor will appear, giving you full control over the partitioning of you hard drive. This is recommended only to advanced users who understand how partitioning works under Linux. Note that Linux Mint required a partition of at least 9GB and that the default size for a swap partition is 1 to 1.5 times the amount of RAM available on the computer.


Note:- Sometimes the installer doesn't properly handle Summer/Winter time adjustments, so even by selecting the proper city you might see a difference of an hour or so with the correct time. Simply ignore this at this stage and remember to make sure that the time is correct after you reboot in your newly installed Linux Mint desktop.

When you're ready click the "Continue" button.
Enter your real name and a username and password. Every time you'll use Linux Mint you'll use your account with this username and password. Once Linux Mint is installed you'll be able to define other accounts if other people are to use this computer.
Also give your computer a name. This name will be used by your computer on the network or in various places of the system. If you've never really thought about naming your computers, then now is the time. People commonly pick flower (dahlia, rose, tulip) or planet (mars, jupiter, pluto) names for the computers on their network. It's entirely up to you what you want to use, but make sure to pick a name you like and that you will easily remember.
Note:- Capital letters, spaces and special characters are not permitted in the username or in the name of the computer.
If you're the only one using the computer and you want to bypass the login screen, check the option "Log in automatically".
When you're ready click on the "Forward" button.

The installation should take between 10 and 15 minute.

Once the installation is done click the "restart now" button and the liveDVD or liveUSB environment will shut down.
When prompted, remove the DVD from the drive or remove the USB and press Enter. Your PC is now ready to boot Linux Mint from the hard drive.
The Boot Sequence
Upon reboot, if you more than one operating system installed. you should see a "boot menu". Once Linux Mint is finished loading you should see a new screen inviting you to enter your username and password. This screen is the "MDM Login Manager" and is commonly called "MDM". Enter the password you chose during the installation.
Note:- By default, your "root" password is the same as the password you chose during the installation. If you do not know what is means, then don't worry about it.


0 Comments